
Congratulations! You've got team members! Now, how do you go about integrating them into your work?
First and foremost, you'll want to give team members access to your Workspaces.
You can decide on a Workspace-by-Workspace and Member-by-Member basis if someone should have access to a Workspace, and what type of access they should have.
To Assign Workspaces
- Visit the Team module and select your Team card.
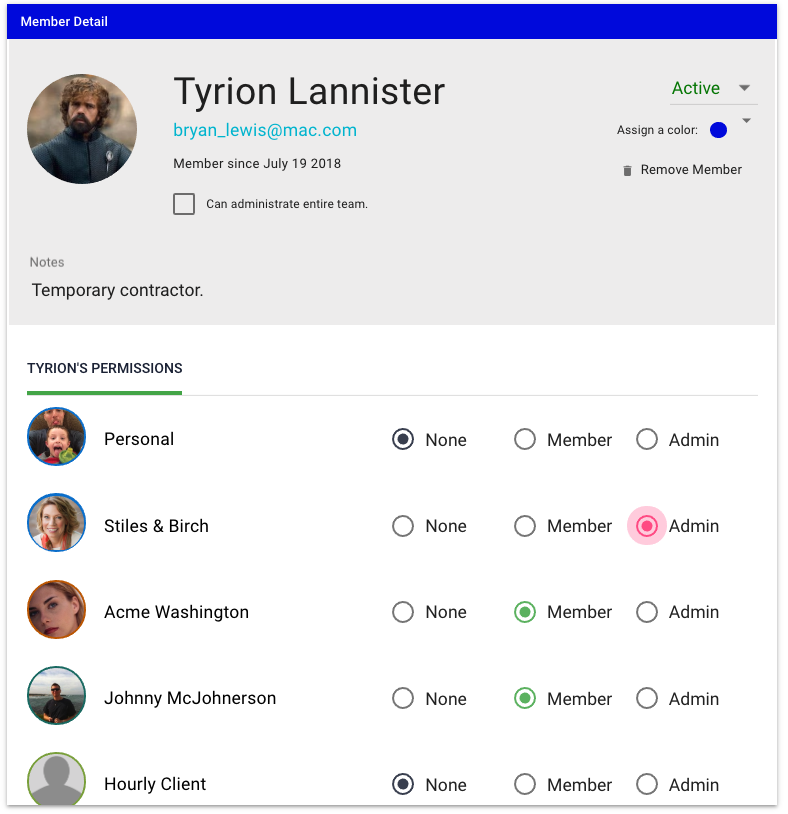
- Select the member you wish to assign.
- In the Member Detail panel that opens, you'll find every Workspace represented with three different access options.
- For each Workspace, select the access level you wish to grant this member:
- None: The user will not see this Workspace in any way.
- Member: The user will see this Workspace in Adminja and can work on Tasks, Details, and can log time.
- Members cannot modify or reassign tasks that someone else owns.
- Members cannot see the Billing tab for Client Workspaces
- Members will ONLY see their own time in Time reports.
- Members do not see plan costs or hourly rates in reports.
- Members do not see Task activity logs.
- Members cannot see Details or Tasks that have been flagged "Admin Only"
(See "Hiding Tasks" and "Restricted Details" for more information.)
- Admin: The user will see this Workspace in Adminja, and can work on Tasks, Details, and can log time.
- Admins can see the Billing tab for Client Workspaces
- Admins can reassign any task.
- Admins can view Task activity logs.
- Admins will see EVERYONE's time in Time reports.
- Admins will see billing rates in some time reports.
- Admins can see "admin only" Task cards and Detail cards.
- None: The user will not see this Workspace in any way.
Note: When Workspace access for a member is changed, they will receive a notification letting them know if they have been added or removed, and what level of access they have been granted.